No products in the cart.
Welcome to a festive fusion of flavors and holiday cheer brought to you by Snapdragon Cannabis Co. In this culinary exploration, we present a collection of carefully crafted recipes designed to elevate your holiday celebrations. As you embark on this flavorful adventure, whether you’re a seasoned cannabis chef or a newcomer to the world of edibles, each recipe promises a euphoric experience in varying degrees of culinary difficulty. Before making your cannabis-infused dishes, here are some quick guides on how to get your concentrates or flower ready for use!
Decarb your THCA first before infusing your butter, oil, and fats!
THCA products like our THCA Flower and THCA Live Resin can be decarboxylated (or heated) to convert the THCA content into active Delta-9 THC, the classic form of intoxicating THC we all know and love. Here are simple steps to decarboxylate our THCA Live Resin. These recipes can also be made with decarboxylated flower, but concentrate is much easier and less herbal-tasting overall. Delta-9 THC is fat soluble meaning after the decarboxylation process is done, you want to add the Live Resin or decarboxylated flower to an oil base; like butter, coconut oil, chocolate, and any other fat-rich substance. This will help maximize the psychoactive potential of your recipes and give you satisfying effects after every bite.
It’s also essential to note that products like our Delta-8 THC Distillate do not require decarboxylation because Delta-8 THC distillate is already in its active form.
Decarbing your Live Resin
Decarboxylation of THCA into Delta-9 THC is usually anywhere from 75-90% efficient, meaning you may be losing 10-25% of the Delta-9 THC content after the product has been fully decarbed. Our THCA Live Resin is lab-tested at 85% THCA, meaning roughly 850mg of THCA per gram of concentrate. After decarboxylation, you can expect your Live Resin to have a content of 650-700mg+ Delta-9 THC per gram.
Ingredients and Materials:
- THCA Live Resin (desired amount for recipe)
- Parchment paper
- Oven-safe container (glass or silicone)
- Baking sheet
Instructions:
- Preheat Your Oven: Preheat your oven to a low temperature, around 200°F (93°C). The lower temperature is necessary to preserve the delicate terpenes and avoid degrading the live resin.
- Prepare the Oven-Safe Container: Place the THCA live resin in an oven-safe container. You can use a glass or silicone container that can withstand the low heat of the oven.
- Decarboxylate in the Oven: Put the container with the live resin in the preheated oven. Keep an eye on it, and let it heat for about 15-30 minutes. This shorter time frame is due to the fact that live resin is already partially decarboxylated during the extraction process.
- Monitor the Process: Watch for any signs of bubbling or changes in texture, which indicate that the THCA is converting to THC. The live resin may become more viscous as it warms.
- Cool Before Use: Remove the container from the oven and allow the live resin to cool. Once cooled, it’s ready for use in various applications, like making edibles, tinctures, or even salves and balms.
Note: It’s crucial to use a low temperature and a short duration to prevent over-decarboxylation and preserve the live resin’s unique characteristics.
Decarbing Cannabis Flower
Ingredients and Materials:
- High THCA Cannabis Flower
- Baking sheet
- Parchment paper
- Grinder
Instructions:
- Preheat Your Oven: Preheat your oven to 240°F (115°C). This temperature is low enough to decarboxylate the cannabinoids without degrading them.
- Grind the Cannabis: Use a grinder to break down the cannabis flower into smaller, more manageable pieces. This increases the surface area for decarboxylation.
- Prepare the Baking Sheet: Line a baking sheet with parchment paper. This prevents the cannabis from sticking to the surface and makes for easier cleanup.
- Spread the Cannabis: Evenly spread the ground cannabis on the parchment paper. Ensure that it’s in a single layer to facilitate uniform decarboxylation.
- Decarboxylate in the Oven: Place the baking sheet in the preheated oven. Set a timer for about 40-60 minutes. The exact time may vary based on factors such as oven accuracy, the moisture content of the cannabis, and personal preference.
- Stir Occasionally: Every 10-15 minutes, gently stir the cannabis on the baking sheet to promote even decarboxylation.
- Check for Readiness: The cannabis should turn a slightly darker shade of brown and become dry to the touch. Once you notice this change, and the kitchen starts to fill with a distinct aroma, the decarboxylation process is likely complete.
- Cool Before Use: Remove the baking sheet from the oven and allow the decarboxylated cannabis to cool. Once cooled, it’s ready for use in various recipes or for direct consumption.
Note: Be cautious about the odor during the decarboxylation process, as it can be quite strong. Proper ventilation is recommended.
Following these steps will help ensure that your cannabis is decarboxylated effectively, unlocking its full potential for consumption.
-
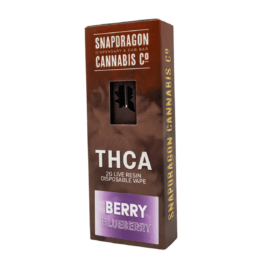
 THCA Live Resin 2 Gram Disposable Vape$39.99
 -
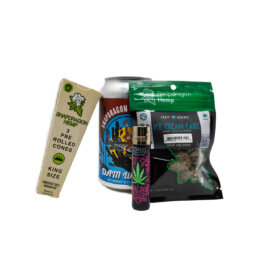
Snapdragon Sip & Smoke Bundle$44.99 – $49.99
-
THCA 1g and 1/2g Pre-Roll 2pks$11.99 – $19.99
-
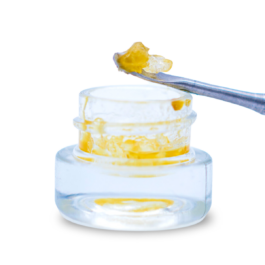
THCA Diamonds & Saucy Diamonds$39.99 – $44.99

Snapdragon Snickerdoodle Cookie Recipe (Makes 24 15mg Cookies)
Ingredients:
- 1 cup unsalted butter (2 sticks)
- 1/2 gram decarbed THCA Live Resin (~350mg Delta-9 THC)
- 2 cups granulated sugar
- Zest of one orange
- 4 cups all-purpose flour
- 1 teaspoon baking powder
- 1 teaspoon cinnamon
- 1/2 teaspoon salt
- 2 large eggs
Directions:
- Prepare Dosed Butter:
- In a saucepan, melt the unsalted butter over low heat.
- Add decarbed live resin or flower material to the melted butter and whisk vigorously until well combined.
- Use an immersion blender to ensure a smooth and even mixture.
- Allow the dosed butter to cool for at least 3 hours.
- Prepare Aromatic Sugar:
- In a separate bowl, measure the granulated sugar.
- Zest an orange directly onto the sugar.
- Massage the orange zest into the sugar with your hands to release the aromatic oils.
- Combine Dry Ingredients:
- Sift together the all-purpose flour, baking powder, cinnamon, and salt in a separate bowl.
- Cream Dosed Butter and Sugar Zest:
- In a stand mixer, cream together the dosed butter and the sugar-zest mixture until light and fluffy.
- Add Eggs:
- Add the eggs one at a time, making sure to scrape down the sides of the mixing bowl between additions.
- Combine Wet and Dry Mix:
- Gradually add the wet mixture to the bowl of dry ingredients.
- Use your hands to fold the ingredients together until a dough is formed.
- Shape and Chill Dough:
- Form dough balls and place them on a baking tray.
- Lightly press down the tops of the dough balls.
- Transfer the dough balls to a cookie container with parchment paper between layers.
- Chill the dough in the fridge until ready to bake.
- Bake:
- Preheat the oven to 350°F.
- Bake the cookies for 3 minutes, then rotate the baking tray.
- Continue baking for an additional 4 minutes or until the edges are golden brown.
- Enjoy! Dosed at ~15mg per cookie, 24 cookies total (may vary in size)
Note: Adjust the decarbed live resin or dosage according to your preference and tolerance.
Christmas Chronic Fudge (Makes 16 40mg Squares)
Ingredients:
- 1 2/3 cups finely chopped bittersweet chocolate chips (10 oz.)
- 4 ounces finely chopped unsweetened baking chocolate
- 1 (14-oz.) can sweetened condensed milk
- 8 tablespoons unsalted butter
- 1 gram THCA Live Resin decarbed (~700mg Delta-9 THC)
- 1/2 tablespoon light corn syrup
- 1/4 teaspoon sea salt
- 1/2 teaspoon instant espresso powder
- 1 teaspoon vanilla extract
- 3 tablespoons red, green, and white sprinkles for decorating
- Flake salt (optional)
Instructions:
- Grease a 7- or 8-inch square baking pan with cooking spray and line it with parchment paper, leaving some overhang on all sides. Lightly grease the parchment paper with cooking spray and set aside.
- Over a double boiler, combine finely chopped bittersweet and unsweetened baking chocolate, stirring occasionally until almost completely melted with very few lumps remaining. Remove from heat and transfer to the bowl of a stand mixer.
- In a clean bowl over the double boiler, combine sweetened condensed milk, butter, corn syrup, salt, espresso powder, and vanilla. Stir until the butter is completely melted, and the mixture is hot to the touch. Transfer the mixture to a liquid measuring cup with a spout.
- Fit the stand mixer with a paddle attachment and add 1/3 of the condensed milk mixture to the melted chocolate. Beat on medium until fully incorporated. Add another 1/3 of the condensed milk mixture, beating until smooth and fully incorporated. Add the final 1/3 of the condensed milk mixture and beat on medium-high until the fudge becomes glossy and slightly stretchy, for 2 to 3 minutes.
- Immediately transfer the mixture to the prepared baking pan and spread it evenly with a spatula. Evenly cover the surface with sprinkles and flake salt, gently pressing them into the fudge. Allow it to cool to room temperature before covering and refrigerating for at least 4 hours.
- Remove the fudge from the baking pan and parchment paper, and cut it into 16 squares.
- Enjoy! Dosed at ~40mg per Square, 16 Squares Total
Santa’s Ganja Granola Bars (Makes 8 20mg Squares)
Ingredients:
- 1 cup old-fashioned oats
- 1/2 cup shredded coconut
- 1/4 cup chopped almonds
- 1/4 cup dried cranberries
- 1/4 cup honey
- 1/4 gram THCA Live Resin (~175mg Delta-9 THC)
- 1/4 coconut oil
- 1/2 teaspoon vanilla extract
- A pinch of salt
Instructions:
- Preheat your oven to 325°F (163°C) and line a baking dish with parchment paper.
- In a mixing bowl, combine oats, shredded coconut, chopped almonds, and dried cranberries.
- In a small saucepan, melt cannabis-infused coconut oil over low heat. Once melted, stir in honey, vanilla extract, and a pinch of salt.
- Pour the wet mixture over the dry ingredients and mix thoroughly until everything is well coated.
- Press the mixture firmly into the prepared baking dish.
- Bake for 20-25 minutes or until the edges are golden brown.
- Allow the granola bars to cool completely before cutting into squares.
- Enjoy! Dosed at ~20mg per Square, 8 squares total.
Kushmas Gingerbread Squares (Makes 9 40mg Squares)
Ingredients:
- 2/3 cup packed dark brown sugar
- 2/3 cup molasses or sorghum syrup
- 2/3 cup boiling water
- 1/4 cup cold unsalted butter, cubed
- 1/2 gram THCA Live Resin (~350mg Delta-9 THC after decarb)
- 1 tsp. baking soda
- 1/2 tsp. kosher salt
- 1 large egg
- 1 1/2 cups all-purpose flour, plus more for pan
- 2 tsp. ground ginger
- 1 tsp. ground cinnamon
- 1/4 tsp. ground nutmeg
- 1/4 tsp. ground allspice
- 1/4 tsp. ground cloves
- 1/4 tsp. black pepper
- Powdered sugar, for dusting
- Whipped Cream
Instructions:
- Prepare Oven: Preheat the oven to 350°F.
- Make Infused Molasses Mixture: In a medium bowl, whisk together dark brown sugar, molasses (or sorghum syrup), boiling water, and cubed butter until the butter melts. Whisk in baking soda and kosher salt. Allow the mixture to stand until lukewarm, about 25 minutes. Whisk in the egg.
- Combine Dry Ingredients and Brown Sugar Mixture: In a small bowl, whisk together all-purpose flour, ground ginger, ground cinnamon, ground nutmeg, ground allspice, ground cloves, and black pepper. Add this mixture to the molasses mixture, and whisk until smooth.
- Add Batter to Pan: Pour the batter into a generously greased (with butter or cooking spray) and floured 9-inch square pan.
- Bake and Cool: Bake in the preheated oven until a toothpick inserted in the center comes out clean, 20 to 25 minutes. Allow the gingerbread to cool in the pan for 10 minutes. Transfer it to a wire rack, and let it cool completely, about 1 hour. For the best texture, wrap it tightly in plastic wrap or place it in an airtight container, and let it stand at room temperature overnight before serving. Store in an airtight container for up to 3 days.
- Top with Powdered Sugar and Whipped Cream: Just before serving, sprinkle the gingerbread with powdered sugar and cut it into 9 squares. Serve with your choice of Whipped Cream.
- Dosed at ~40mg per Square, 9 Squares Total
Canna Christmas Bark (185mg Total)
Ingredients:
- 7 Red Holiday Oreos (79 grams), broken into pieces
- 7 Cool Mint Oreos (79 grams), broken into pieces
- 1½ cups stick pretzels (60 grams)
- ½ cup peppermint baking chips (85 grams, Andes recommended)
- ½ cup mint M&M’s (85 grams, divided)
- ½ cup peanut M&M’s (85 grams, divided)
- 1/4 gram of THCA Live Resin decarbed (~175mg Delta-9 THC)
- 1 pound white chocolate baking bars (454 grams, Ghirardelli recommended)
- 2 tablespoons red and green sprinkles (24 grams)
Recommended Equipment:
- Kitchen Scale (optional)
- Baking Sheet
Instructions:
- Cover a large baking sheet with wax paper (or use parchment sprayed with nonstick spray as a substitute).
- Spread the broken Red Holiday Oreos, Cool Mint Oreos, pretzels, peppermint chips, and about ¾ of the mint and peanut M&M’s onto the prepared baking sheet.
- Place the white chocolate in a microwave-safe container and microwave for 1½ minutes on medium power. Stir in your decarbed THCA Live Resin, and then microwave for another minute until melted and smooth. Watch it carefully to prevent burning.
- Pour the melted chocolate over the cookie and candy mixture, spreading with a spatula if needed to coat completely.
- Sprinkle the remaining mint and peanut M&M’s and red and green sprinkles over the still-wet chocolate. Ensure the toppings adhere while the chocolate is still soft.
- Chill the tray of bark until set and firm, approximately 1 hour. Once set, gently break the bark into small, irregular pieces.
- Enjoy! Dosed at ~175mg Delta-9 THC per batch, break into even pieces for accurate dosing.
Extra Tips:
- Make space in your fridge for a full baking sheet, as the Christmas bark requires at least an hour to set.
- Wax paper is the preferred choice, but if unavailable, use non-stick spray on parchment paper for best results.
- Feel free to use any variety of Oreos or M&M’s according to your preferences.
- Store Christmas bark in a cool, dry place away from direct sunlight.
For a serene and joyous family gathering this holiday season, we highly recommend trying any of the delightful recipes featured in this article to bring smiles and warmth to everyone’s faces. We’d love to know how these recipes treated you and your gatherings this year. Happy Holidaze, and enjoy responsibly!